
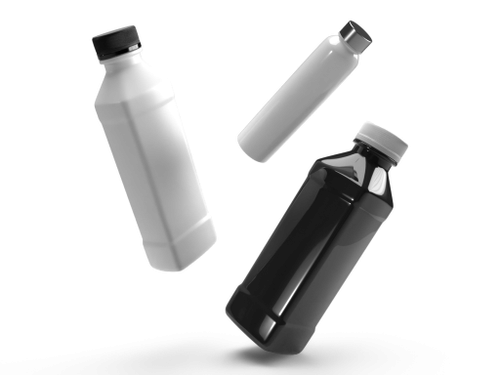
Introduction to Screw Capping Bottles
Screwing a cap onto a bottle is not rocket science, right? You would be forgiven for thinking so.
But like most things in business: there is more to it than you might think, and, the more you understand about it from the start, the less likely you are to experience difficulties further down the line.
These notes will hopefully give you an insight into what is involved in screwing caps onto bottles – at scale.
Don’t forget: we’re here to help you find the best solution for your specific needs and are always happy to answer any questions you might have.
Caps and Bottles: Things to consider
In this guide, we will be talking about screw caps, probably in the size range of 10 to 125 mm Ø, and containers or bottles, ranging from 5ml vials to 25-litre drums.
Whatever the size of your cap or bottle, the principles are very much the same: the cap needs to be screwed on so as to seal properly and to be capable of being manually removed.
Therefore, the threads on the cap and bottle need to match. But that’s obvious, right? Why are we pointing this out?
Experience shows that all too frequently caps are chosen for aesthetic reasons, rather than functional ones.
Indeed, on one notable occasion, the thread in the cap had been moulded with the thread profile upside down, which resulted in thread damage, contamination of the product and, sadly, a substantial loss of money for that business.
This ‘misfit’ problem is understandable in many ways because caps and containers are often sourced separately and involve different manufacturing processes.
Separate sourcing requires careful consideration of the method of sealing, as well as the thread form.
If you intend to use a wad in the cap, will it fall out?, is the neck of the container suitable to compress the wad?
If a foil is used requiring induction heat sealing, will the rise in temperature and subsequent cooling cause the cap to loosen?
Normally the strength of a cap is good across the crown but the resistance to deformation when squeezing the skirt is much less, so any gripping forces should be applied to the strongest part of the cap – normally the crown.
Forces applied to the skirt can cause the skirt to deform and grip the neck of the bottle, thus resisting the assembly.
Such cap features as orientation stop, tamper-evident rings, pump-action sprays and metallised finishes, all have a bearing on the choice of capping equipment but, in simple terms, if a cap can be readily screwed on and removed by hand then it can probably be done by a capping machine.
Getting the cap onto the bottle
Generally speaking, this presents the biggest challenge in most capping applications, so let’s take a look at the methods available.
Manual Placement Capping Machines
Where the cap is loaded onto the bottle by hand and, in some cases, the thread is ‘started’.
In these cases, all the cap-tightening head has to do is engage the cap, tighten it, and release, which is fairly simple and fast.
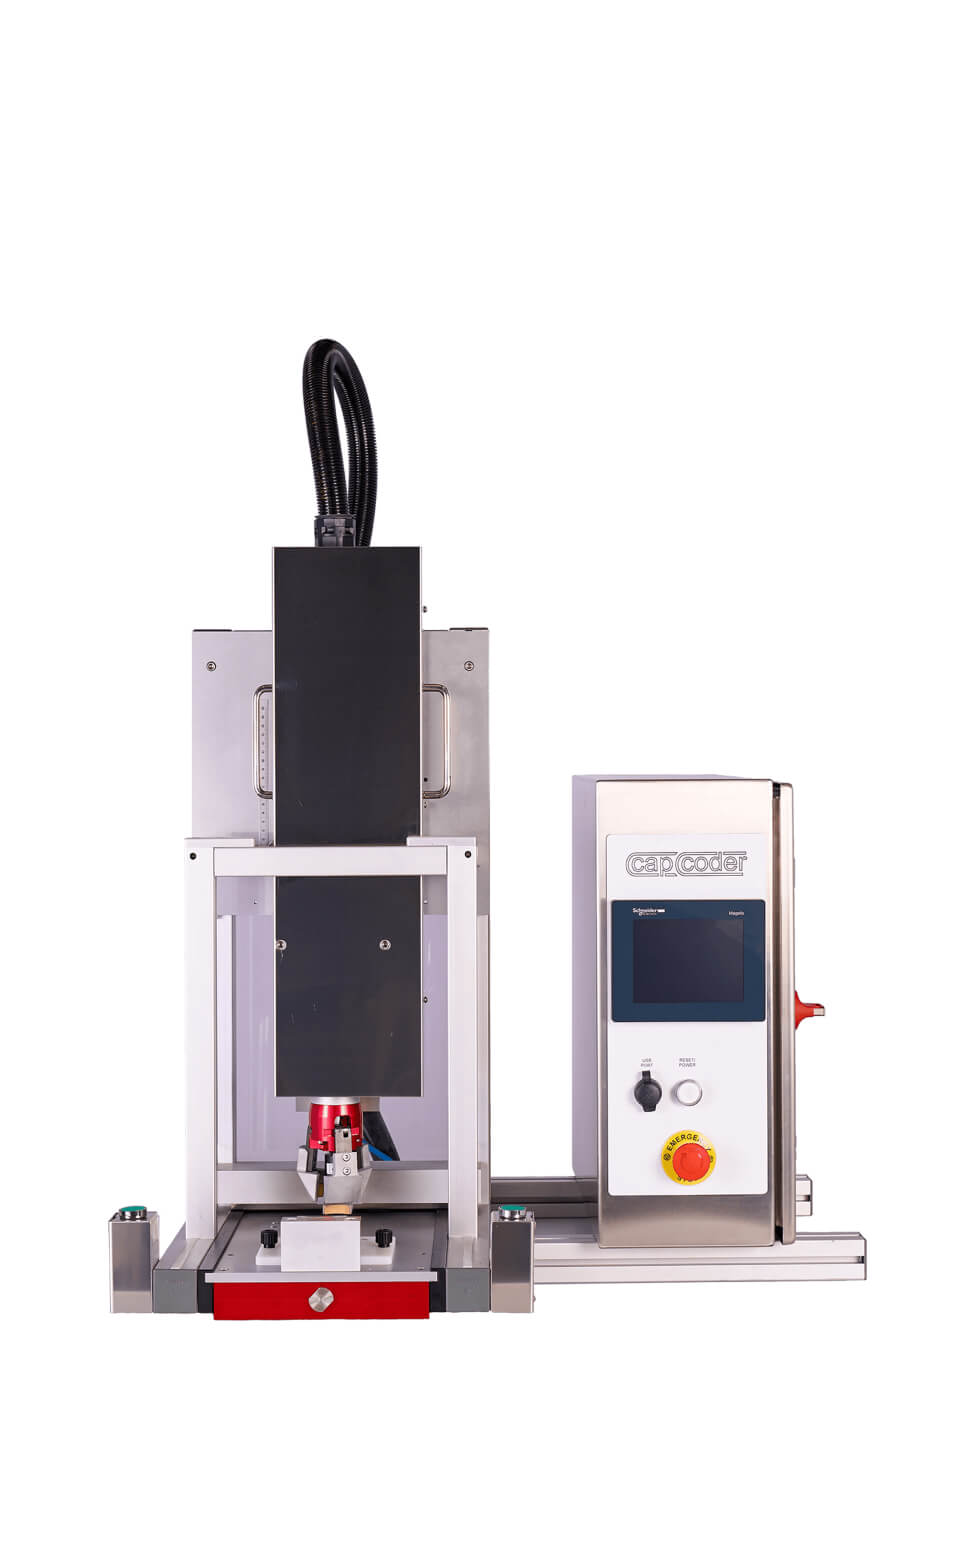
In fact, the torque head can usually be expected to work faster than the manual cap loading.
Not all caps will sit squarely onto a bottle so we must be careful that engaging the cap with the torque head results in proper tightening.
For instance, the typical 4-start metal jam-jar cap does not usually sit squarely onto a jar and needs contra-rotating to find the thread.
Also, caps which have a thread to the bottom of the skirt tend not to mate cleanly with a bottle that is threaded up to the rim and so needs to be manually started.
Very often, the ability to use a torque head to its optimum production rate will require two or three operators to place the caps onto the bottles.
Pick and Place – Using Capping Head to Pre-place Cap
This method lends itself to automatic operation and works well on practically all combinations of cap and bottle, but conversely it is considerably slower than other methods because the torque head does more work in each cycle.
What happens is: a cap is presented to the torque head which picks it up, the mechanism that presents the cap moves out of the way and the cap is then screwed onto the bottle.
Therefore this results in approximately twice the amount of work, hence the reduction in production rate.
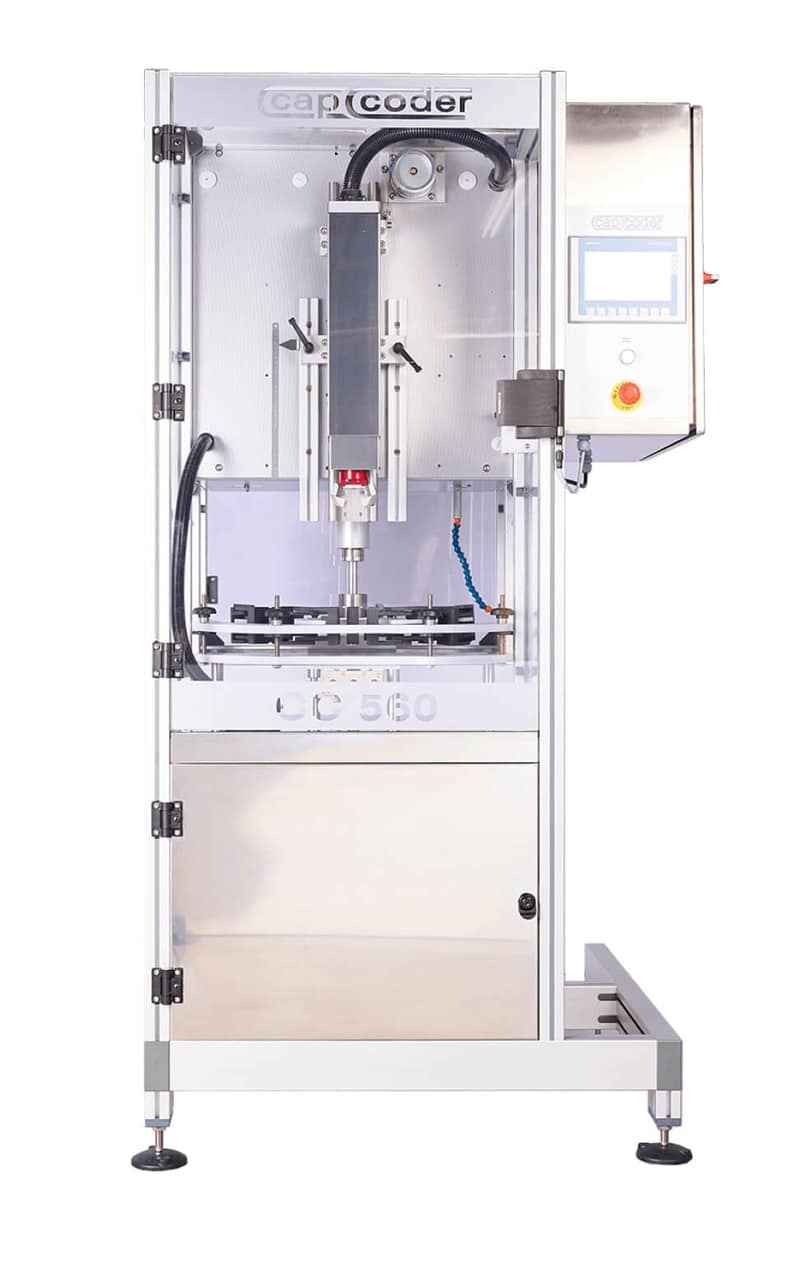
Neck Transfer Capping Machines
Some caps and bottles lend themselves to this method where the bottle is driven past an inclined chute/escapement and the neck of the bottle engages the cap, pulling it through the escapement, ready to be screwed on.
Ideally, the lower internal skirt of the cap and the top of the bottle-neck should be plain, so that the geometry of transfer does not change.
When evaluating the suitability of caps and bottles for this method, bear in mind that caps and/or bottles can pass through the escapement in a variable relationship to each other and engagement needs to take place on all occasions.
This method is quite fast but, because of the geometrical constraints on the cap and bottle, it is not very versatile.
Upper Starwheel Capping Machines
Many bottles lend themselves to being handled in starwheels and it is quite easy to have an additional starwheel, into which caps are fed so as to be immediately above the bottle.
The caps rest on a dead plate and the cap drops onto the bottle at the end of the dead plate.
A variation on this provides for the bottle to be raised up into the cap as the starwheel rotates.
The geometry of the cap must be suitable and, of course, access for the torque head is essential.
These are basic methods that are chosen to suit not just the application but future probabilities, and can be a combination of methods.
Applying the torque
The way in which the torque is applied to the cap needs to suit the cap.
For instance: to use a rubber cup which has to be pressed down onto the cap would obviously be inappropriate for a pump-action spray and to use a collet would be inappropriate for a highly polished cap.
A rubber-friction cup, as often used with a pneumatic screwdriver, needs a constant engagement pressure to apply a consistent torque and it is normally only suitable for plain and simple caps.
Collets require caps that are externally round and dimensionally consistent, and not susceptible to damage.
Caps with pronounced vertical ribs lend themselves to the use of a machined cup that engages the ribs.
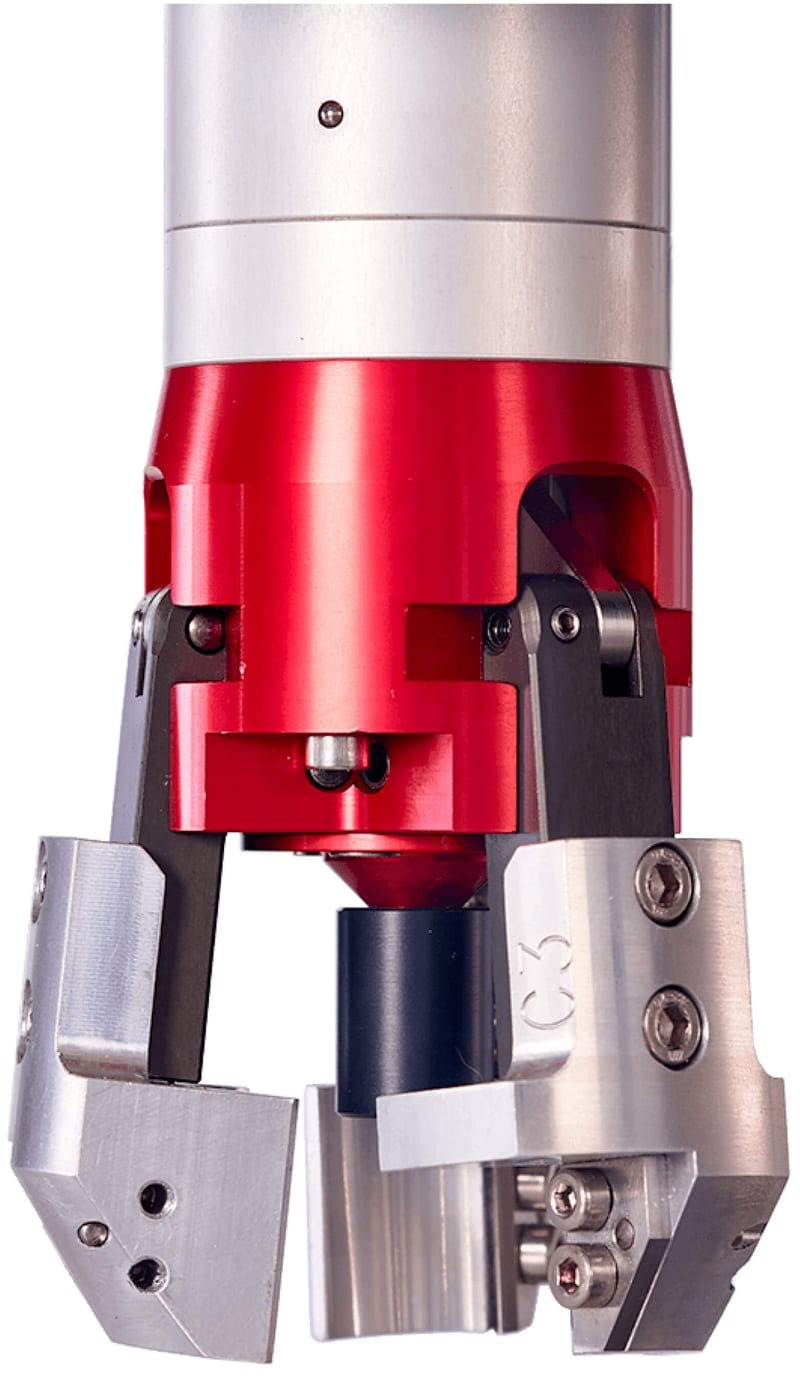
The method generally used by Cap Coder uses rubber lined gripping fingers, which grip the cap in much the same way as human fingers.
This is dimensionally tolerant, does not mark sensitive surfaces and accommodates difficult shapes.
How much torque
The applied torque needs to prevent leakage and normally the cap needs to be manually removed.
Essentially that’s it, but what other factors are relevant?
- Thread compatibility
- Contamination (i.e. a thread contaminated with oil will not be the same as one coated with superglue)
- Cap colour (a change of colour is actually a chemical change which can affect dimensions)
- Temperature (plastics harden at low temperature)
- Age (caps can loosen with age, go brittle as well)
From this it will be seen that it is the un-tightening torque which is important and that tightening torque is not the only factor in arriving at a proper solution – other QC factors are necessary.
Irrespective of this, applied torque can be monitored if required.
A point to bear in mind is that the application of too much torque can jump the cap thread, resulting in a loose cap.
Getting a perspective on what is required
Ok, you want to fill, plug and cap your bottles as fast as you can, without trouble, and utilising as few operators as possible.
Additionally, the equipment must be well affordable, on a short delivery and reliable.
Of course, we all want that, but let us look in a little more detail at what should be identified for the job to go smoothly.
Filling
In most machines the bottle has to be stopped in order to be capped and often the bottle approaches the machine along a conveyor.
So, think in these terms: the bottle stops but the liquid inside it tries to carry on and it becomes evident that spillage is a potential problem.
The ullage, viscosity and shape of the neck, plus the speed of approach, all needs to be considered and a simple test in which a filled bottle is stopped on a conveyor running at the anticipated speed will show what is practical.
Take a look at our range of filling machines to find out more.
Plugging
This is included because it often happens on the same capping machine.
Most plugs have a nice ‘lead in’ or chamfer on the end of the plug that enters the bottle but, incredibly, some do not.
Occasionally, a plug is so mismatched that pushing the plug into the bottle at production speeds collapses the bottle, whilst some bottles are provided with a neck collar that can be supported to oppose the collapse.
It is not unknown for the interference fit of a plug to be so great that insertion swells the neck of the bottle to such an extent that the screw fit of the cap is unacceptable.
A small plug is very light and automatic feeding is adversely susceptible to quite small moulding detects – good quality control is very important.
Production Rate
Each capping machine manufacturer will have their own view on the production rate for a particular application, but there are many factors to consider:
- What rate is requested?
- What are the bottle and cap details?
- Are samples available?
- What is the filling, ullage, weight?
- The size of the container will affect the method of handling
- How many torque heads are required?
- Can the tightening torque be achieved?
There is always a finite production rate for any particular single head application, and to exceed this rate will necessitate increasing the number of torque heads and the method of handling.
This in turn has a significant effect on the cost and complexity of the machine.
So, the estimate of required production rate needs to be as realistic as possible, bearing in mind both existing and future requirements.
Often, it is better to have two machines dedicated to a production line than one working close to its limit.
Start or Upgrade your line
The design of capping machines is a very interesting business, with a great variety of applications to be dealt with, almost on a daily basis.
If you have any questions, technical or otherwise, just drop us a line here.
At Cap Coder we tend towards versatile machines at affordable prices, with short payback periods, and we would be happy to respond to your enquiries.
You might also be interested in…
Our capping machines
Whether you need a complex or simple production line.
Find out more about our robust and reliable capping machines.
Start your production line
Looking to start a new production line or upgrade an existing one?
Use our unique spec a machine application to get started.